Table of contents:
- Structure of scroll view
- Content Layout guide and Frame Layout guide
- Step 1: Put a scroll view into the view controller and set constraints
- Step 2 : Put a view inside the scroll view and set constraints
- Step 3: Placing UI Elements inside Content view
Before moving on to how to use a scrollview in storyboard / XIB, I think it's crucial to discuss the structure of scroll view to prevent getting "ambiguous scrollable content width / height" error message in Interface Builder.
Structure of scrollview
Scrollview works by having a scrollable content area, like this:
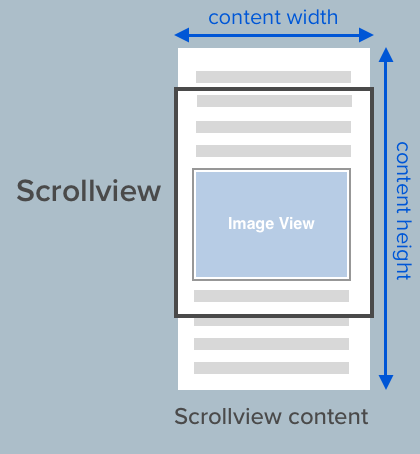
In order for scrollview to work in Auto Layout, scrollview must know its scrollable content (scrollview content) width and height , and also the frame (X, Y , Width, Height) of itself, ie. where should the superview place scrollview and what size.
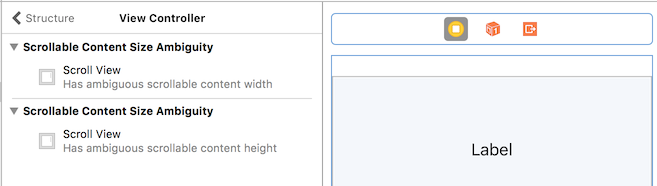
Xcode will show you the error "ambiguous scrollable content width / height" if Auto Layout doesn't know what is the width and height for the scrollable content inside scrollview.
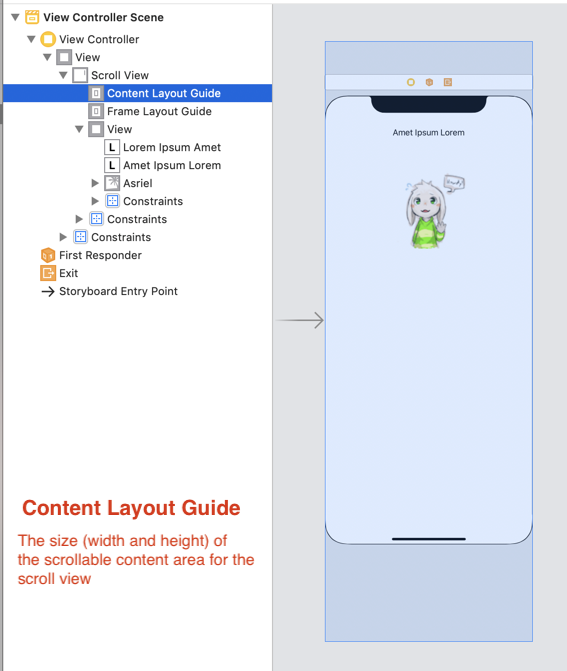
Content Layout guide and Frame Layout guide
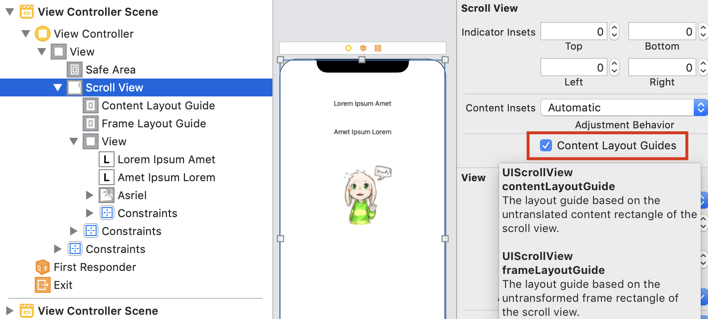
In Xcode 11, Apple has introduced Content Layout Guide and Frame Layout Guide for Scroll View in Interface Builder, which makes it easier to design UI inside Scroll View. This is enabled by default.
To layout a scrollview correctly, we will need two set of constraints :
- Constraints that set the size and position of the scroll view relative to its superview.
- Constraints that set the size of the scrollable content area inside the scrollview, so the scroll view can know the scrollable content dimension and render correctly.
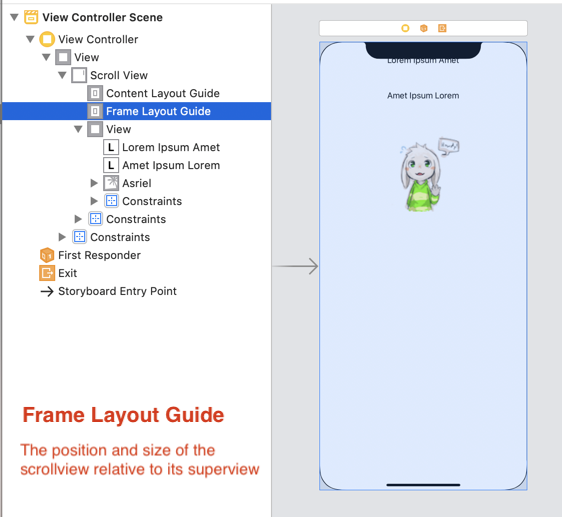
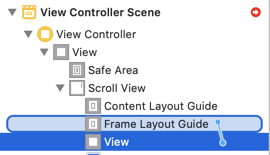
The Frame Layout guide relates to the position (x, y) and size (width, height) of the scrollview itself, relative to the superview it was placed in.
The Content Layout guide relates to the size of the scrollable content area inside the scroll view.
The challenging part is to define enough constraints to let Auto Layout calculate the scrollable content area (Content Layout) width and height, which we will go into in the next section.
Download the sample scroll view project
Not sure if you are doing it right on the scroll view layout?
Download the sample project and compare it yourself!
https://github.com/fluffyes/scrolla/archive/master.zip
Step 1: Put a scroll view into the view controller and set constraints
First, place a scroll view into the view controller, and set some constraints for it so Auto Layout can know how to position and size it.
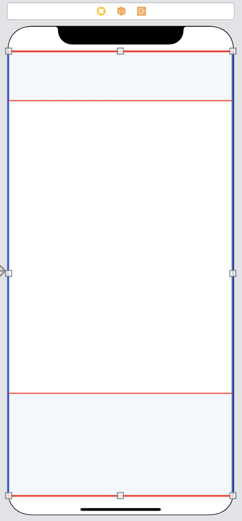
Usually I will pin it to the edges (top, leading, trailing and bottom) of the safe area like this :
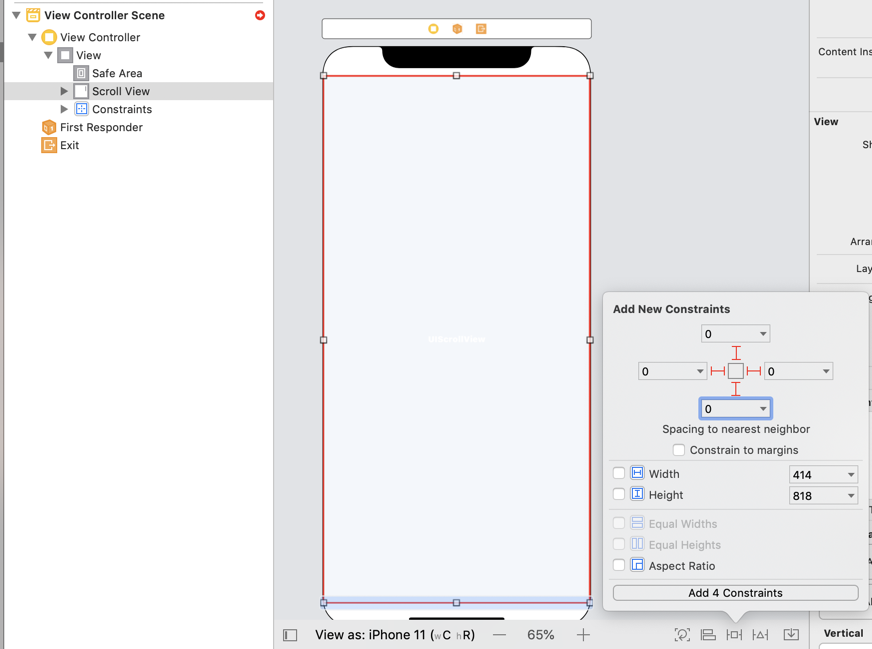
After setting constraints, you will notice there's red lines and errors because Auto Layout don't know the scrollable content size of the scroll view yet. No worries on this as we are going to put a view inside it next.
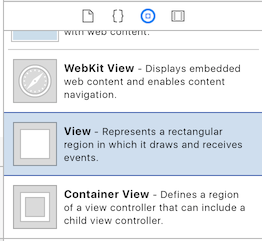
Step 2 : Put a view inside the scroll view and set constraints
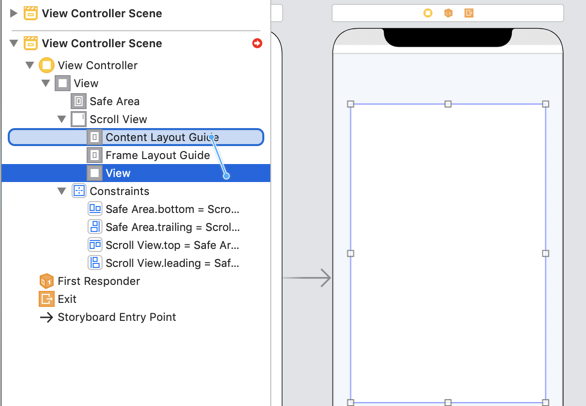
To simplify the height calculation of the scroll content area, add a view inside the scrollview , and add four constraints (leading, trailing, top and bottom, set it to 0) from the view to the scrollview's content layout guide.
Select the view inside scrollview, press and hold control and drag it to the content layout guide.
Then in the constraints selection popup, hold shift to select multiple constraints, select leading / top / trailing / bottom constraint.
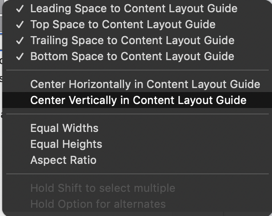
After creating these constraints, edit their constant values to 0, so that the view will be pinned to the leading/top/trailing/bottom edges of the content layout guide :
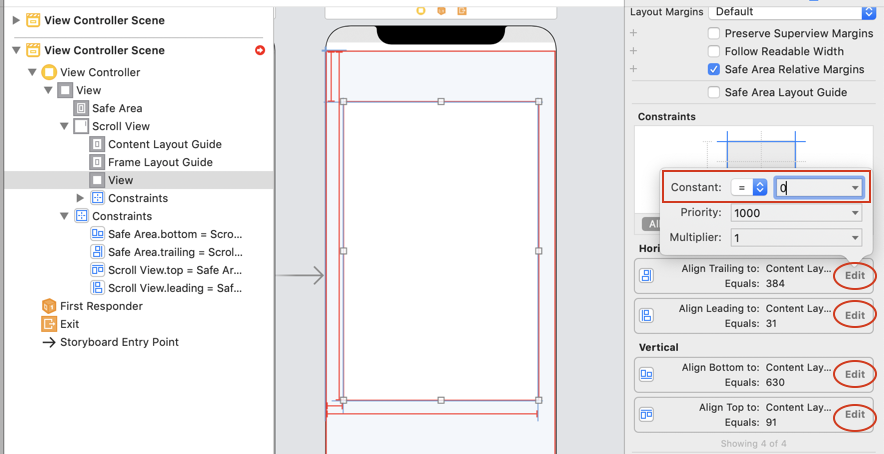
Let's name this view as 'Content View' as this view contains UI elements (content) for the scrollview. Auto Layout will use the content view's' width and height to calculate the scrollable area width / height for the scrollview.
After changing the four constraints value to 0 , you can notice that the red lines are still there. This is because despite pinning the edge of the view to content layout guide, Auto Layout still doesn't know what is the width and height of the view.
As we want to make the scrollview scroll only vertically (it does not scroll horizontally), the scrollable content area width should be equal or lesser than the scrollview size width. Next, we will create an equal width constraint between the view and the scrollview's frame layout guide, so the scrollable content area has the same width with the scrollview.
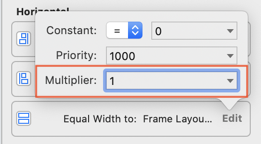
Xcode might create a proportional width constraint for you, if thats the case, edit the 'proportional width' constraint multiplier value to "1" so that it will be equal width.
Now that we have defined the width for the scrollable content area (content layout guide), what's left now is the height of the scrollable content area.
We will set an explicit height constraint value to the content view for now. We will remove it later once we have finished placing elements in it as we want to make the scrollview have dynamic height, based on the content inside it (retrieved from API etc).
Let's set the height for the content view (the view inside scrollview) to 1000 :
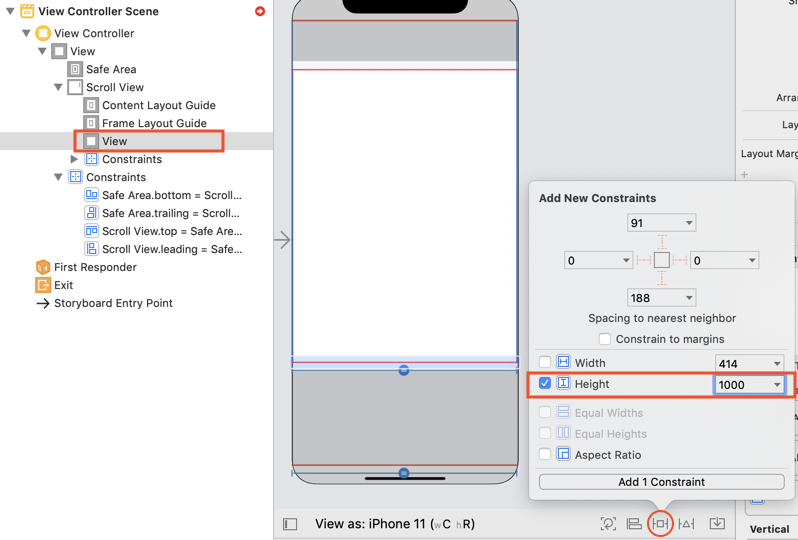
Now we have set the width and height for the view, and Auto Layout can calculate the scrollable content area size, yay! We will remove the explicit height constraint (1000 pt) after finish adding UI elements.
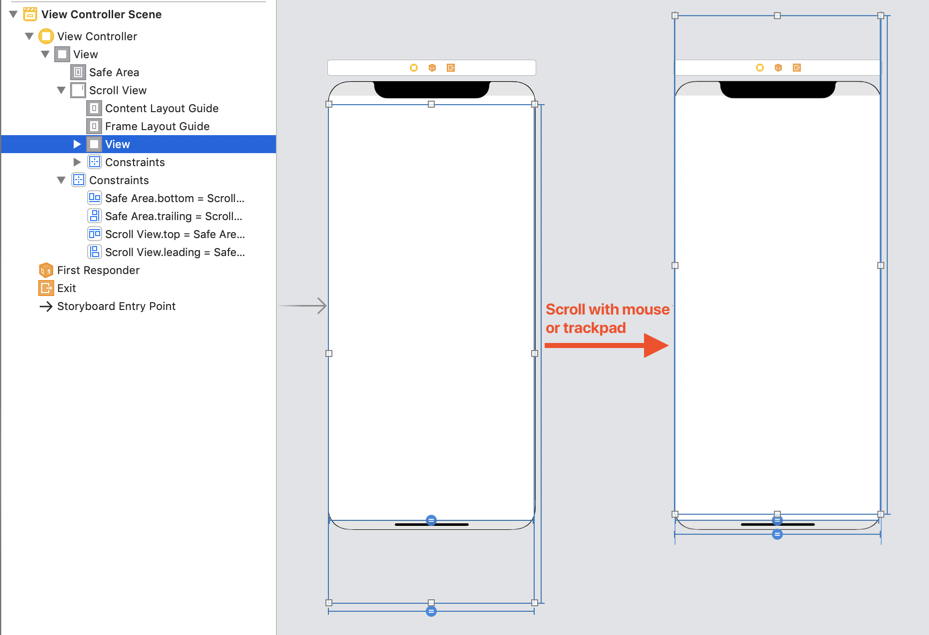
You can scroll the scrollview in the Storyboard / Interface builder! Select the view inside scrollview in Document Outline, then scroll using your mouse or trackpad, you can see the view move.
If you don't want to keep scrolling and want to see the whole scrollable content area, you can elongate the view controller height by setting it to freeform with bigger height like this :
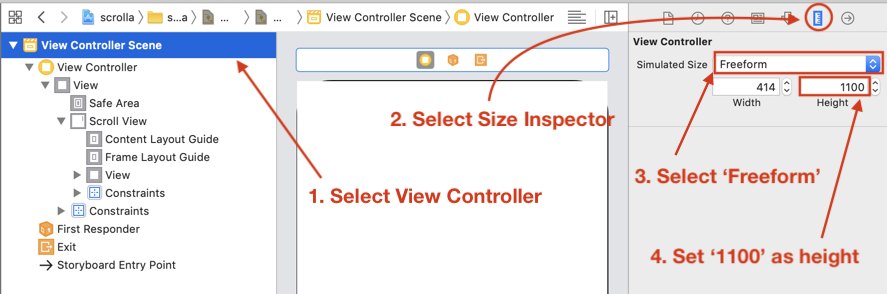
- Select the view controller
- Select "Size Inspector"
- For "Simulated Size", select "Freeform"
- Set "1100" as its height
You should see the view controller elongated to 1100 pt height now. Now you can start placing labels, images etc inside the content view (the view inside scrollview). After placing, be sure to create constraints from the top element to the bottom. You can increase the height of view controller in simulated size and height constraint of the content view as you need.
We will go into detail on how to create constraints from top to bottom inside the content view in the next section.
Step 3: Placing UI Elements inside Content view
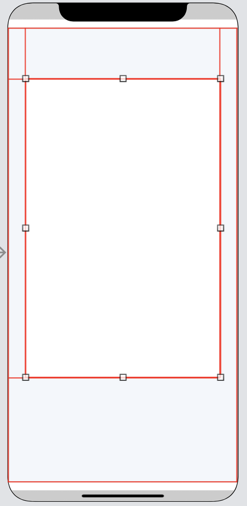
Here's how it looks like after placing labels and image inside the content view in scrollview:
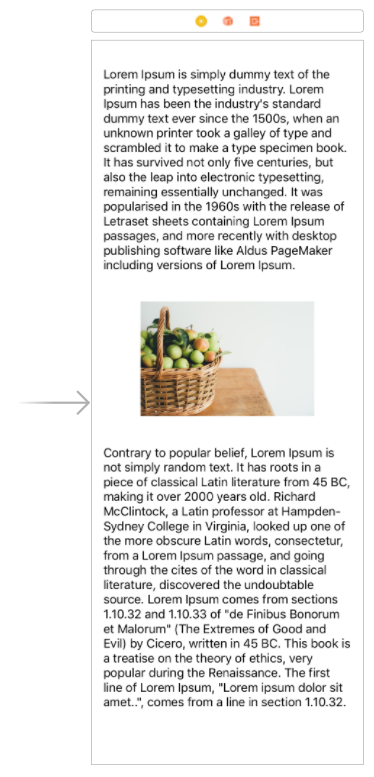
You can start placing elements inside the content view like label, images ,etc. Then add constraints for them so that Auto Layout can calculate their X position, Y position, width and height (can skip width and height if they have intrinsic content size). Remember that the constraints should be between each UI elements and the content view (ie. the view inside scrollview), not with the scrollview.
Your constraints might look like this:
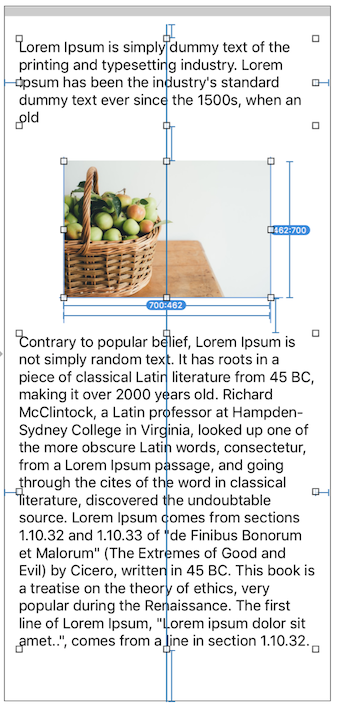
Remember to set enough constraints so that Auto Layout can calculate the scrollable content height after removing the explicit height.

The important note is that the vertical constraints must be connected from the top edge of content view to the bottom edge of content view, this is to ensure Auto Layout can calculate the scrollable content area height.
Now remove the explicit height constraint set on the content view, you should get all blue lines if you have set the constraints correctly.
After setting up constraints, you can create outlet for the labels and set the text value to the JSON value gotten from web API. Your scrollable content area height will expand based on the intrinsic content size of the labels.
This article is an excerpt from the book Making Sense of Auto Layout , if you feel like you have no idea what you are doing when adding / removing / editing constraints, give the sample chapter a try!
Download the sample scroll view project
Not sure if you are doing it right on the scroll view layout?
Download the sample project and compare it yourself!
https://github.com/fluffyes/scrolla/archive/master.zip
