This article assumes your app will only have one scene all of the time. (ie. no multiple scenes at the same time in iPad).
At the end of this post, you will be able to implement a login screen (a navigation controller which can push to registration view), that transition into the main tab controller like this :
Here are some common mistakes I saw other developers did (I did it too when first starting out) :
Common mistakes
1. Presenting the main view from login view on viewDidAppear every time
You might have attempted to present or push the main view controller on the login view controller when user has logged in previously, using code like this :
// LoginViewController.swift

override func viewDidAppear(_ animated: Bool) {
    super.viewDidAppear(animated)

    // if user has logged in previously, present the main view controller

    if let loggedUsername = UserDefaults.standard.string(forKey: "username") {
        let storyboard = UIStoryboard(name: "Main", bundle: nil)
        let mainTabBarController = storyboard.instantiateViewController(identifier: "MainTabBarController")
        mainTabBarController.modalPresentationStyle = .fullScreen

        self.present(mainTabBarController, animated: true, completion: nil)
    }
}
This works but user will have to see the present/push animation every time they launch the app, even if they have already logged in previously :
(I used slow animation so it is easier to notice).
2. Keep presenting view controllers without dismissing
When user taps login, the main view controller is pushed/presented on top, then when user logs out, the login view controller is pushed / presented on top, and keeps repeating. This might look like a seamless experience, but it will keep the view controllers stacked without ever being released from memory, which can cause the app to run out of memory and crash eventually if user keeps on login and logout (unlikely but still).
If you never dismiss the view controllers, they will keep stacking on top like this :
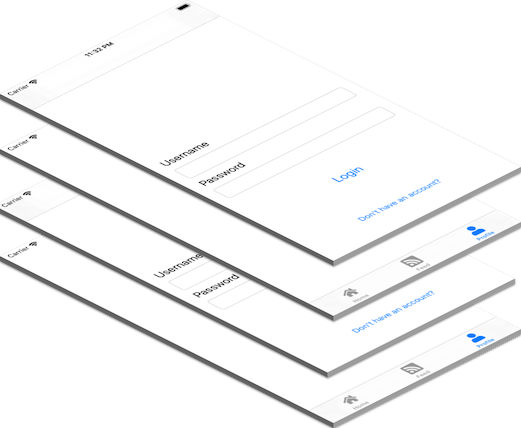
And memory usage will keep increasing as more view controllers are added on top of the stack, notice the memory keeps increasing when I present a view controller :
Changing root view controller
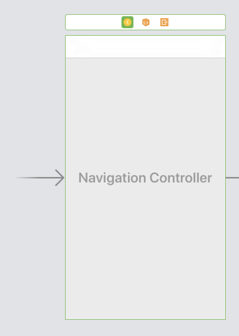
Instead of pushing/ presenting view controller endlessly, a better way to do this is to change the root view controller directly. Root view controller is the bottom-most view controller on the stack. If you are using storyboard, the root view controller is the initial view controller you have set in your storyboard :
Instead of presenting the tab bar controller on top of login view controller:
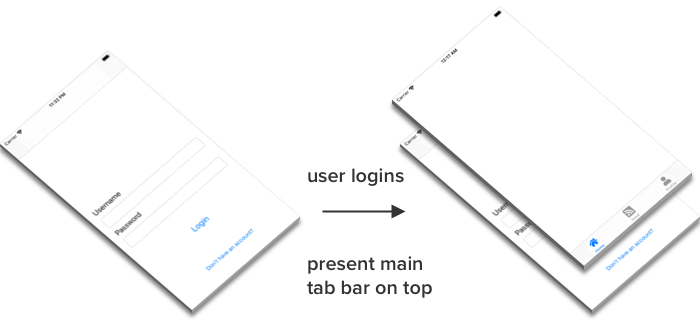
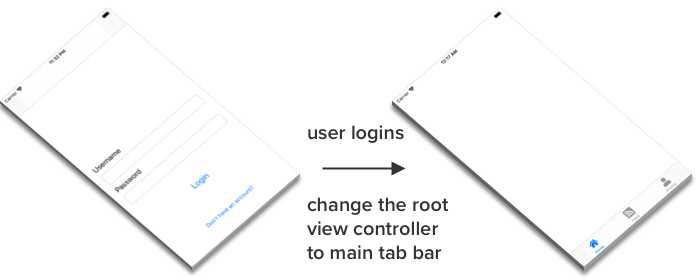
We are going to switch the bottom-most view controller (root view controller) from the login view to main tab view like this :
Step 1: Show the correct view controller on app launch
If the user is logged in, we want to show the Main tab bar controller as the root view controller.
If the user is not logged in, we want to show the Navigation controller that contains the login and register view controller.
Assuming you have a storyboard with a flow similar to this, with navigation controller for the login/ register VC, and a tab bar controller once user has logged in :
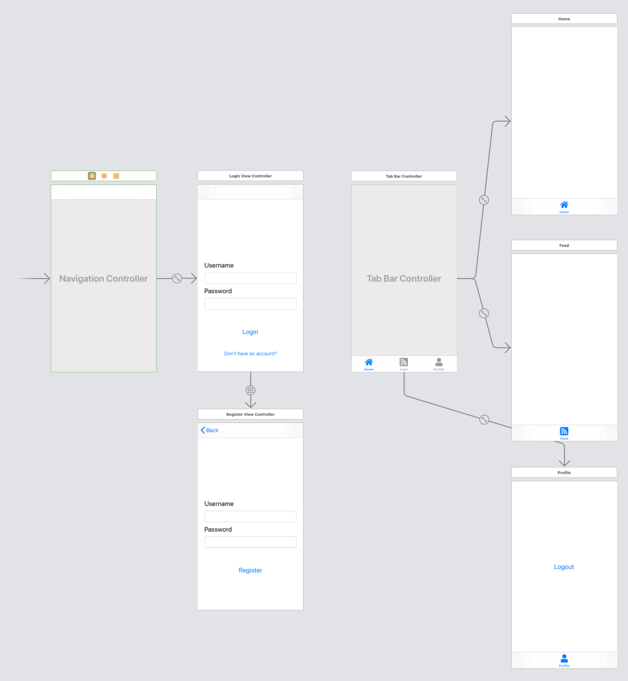
In order to access the view controllers in code, we need to assign them a storyboard identifier. Go ahead and assign storyboard ID for the navigation controller and tab bar controller :
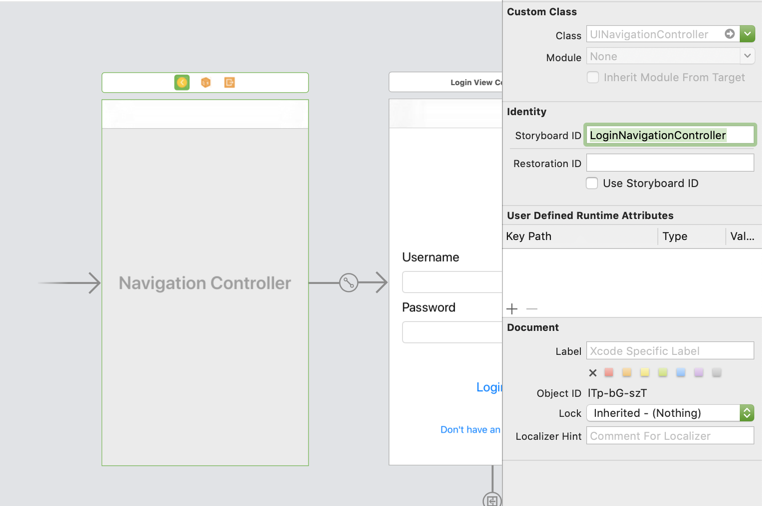
(Storyboard Identifier: "LoginNavigationController" for the navigation controller)
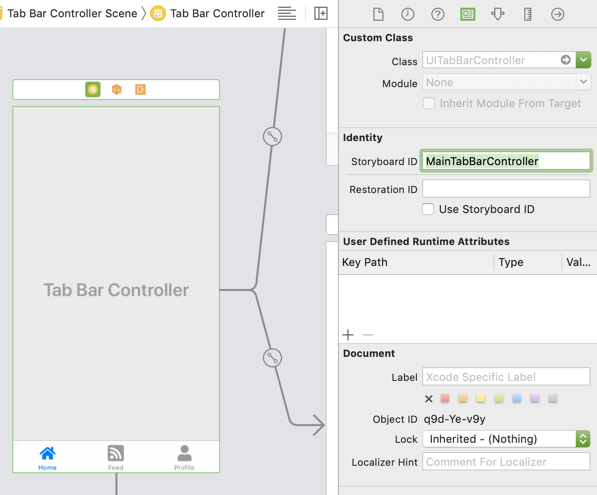
(Storyboard Identifier: "MainTabBarController" for the tab bar controller)
After setting the storyboard identifier, head over to SceneDelegate.swift, and inside the willConnectTo session: function, add these lines :
// SceneDelegate.swift

func scene(_ scene: UIScene, willConnectTo session: UISceneSession, options connectionOptions: UIScene.ConnectionOptions) {
    // Use this method to optionally configure and attach the UIWindow `window` to the provided UIWindowScene `scene`.
    // If using a storyboard, the `window` property will automatically be initialized and attached to the scene.
    // This delegate does not imply the connecting scene or session are new (see `application:configurationForConnectingSceneSession` instead).
    guard let _ = (scene as? UIWindowScene) else { return }

    // add these lines
    let storyboard = UIStoryboard(name: "Main", bundle: nil)

    // if user is logged in before
    if let loggedUsername = UserDefaults.standard.string(forKey: "username") {
        // instantiate the main tab bar controller and set it as root view controller
        // using the storyboard identifier we set earlier
        let mainTabBarController = storyboard.instantiateViewController(identifier: "MainTabBarController")
        window?.rootViewController = mainTabBarController
    } else {
        // if user isn't logged in
        // instantiate the navigation controller and set it as root view controller
        // using the storyboard identifier we set earlier
        let loginNavController = storyboard.instantiateViewController(identifier: "LoginNavigationController")
        window?.rootViewController = loginNavController
    }
}
Don't have a SceneDelegate.swift file in your project? Your project might be created using Xcode 10 or earlier, no worries, in this case, you can put the code in AppDelegate.swift, inside the didFinishLaunchingWithOptions method.
// AppDelegate.swift

func application(_ application: UIApplication, didFinishLaunchingWithOptions launchOptions: [UIApplication.LaunchOptionsKey: Any]?) -> Bool {
    // Override point for customization after application launch.
    // add these lines
    let storyboard = UIStoryboard(name: "Main", bundle: nil)

    // if user is logged in before
    if let loggedUsername = UserDefaults.standard.string(forKey: "username") {
        // instantiate the main tab bar controller and set it as root view controller
        // using the storyboard identifier we set earlier
        let mainTabBarController = storyboard.instantiateViewController(identifier: "MainTabBarController")
        window?.rootViewController = mainTabBarController
    } else {
        // if user isn't logged in
        // instantiate the navigation controller and set it as root view controller
        // using the storyboard identifier we set earlier
        let loginNavController = storyboard.instantiateViewController(identifier: "LoginNavigationController")
        window?.rootViewController = loginNavController
    }

    return true
}
Step 2 : Change the root view controller to main tab bar controller after login
So now instead of presenting the main tab bar controller, we will change the root view controller of the app directly after login.
Let's add a function to switch root view controller in the SceneDelegate.swift file, then we can use this function in all view controllers.
// SceneDelegate.swift

func changeRootViewController(_ vc: UIViewController, animated: Bool = true) {
    guard let window = self.window else {
        return
    }

    // change the root view controller to your specific view controller
    window.rootViewController = vc
}
Then in your login view controller, you can call this function after user successfully logs in :
// LoginViewController.swift
@IBAction func loginTapped(_ sender: UIButton) {
    // ...
    // after login is done, maybe put this in the login web service completion block

    let storyboard = UIStoryboard(name: "Main", bundle: nil)
    let mainTabBarController = storyboard.instantiateViewController(identifier: "MainTabBarController")

    // This is to get the SceneDelegate object from your view controller
    // then call the change root view controller function to change to main tab bar
    (UIApplication.shared.connectedScenes.first?.delegate as? SceneDelegate)?.changeRootViewController(mainTabBarController)
}
UIApplication.shared.connectedScenes.first is used to get the first scene connected to your app, this article assumes your app has only one scene (ie. user cannot open more than one scene of your app in iPad multitasking mode). As your app has only one scene, the .first will get the one and only scene of your app.
Then the delegate is an object (which usually is the SceneDelegate) conforming to the UISceneDelegate protocol, we can cast it back to SceneDelegate object using as? SceneDelegate , then we can access the changeRootViewController method
If your changeRootViewController() function is located in AppDelegate.swift, you can call it using :
(UIApplication.shared.delegate as? AppDelegate)?.changeRootViewController(mainTabBarController)
Now when user logs in, the root view controller will switch like this :
This transition feels abrupt, we can add some animation in the changeRootViewController to make the transition looks smoother :
// SceneDelegate.swift or AppDelegate.swift

func changeRootViewController(_ vc: UIViewController, animated: Bool = true) {
    guard let window = self.window else {
        return
    }

    window.rootViewController = vc

    // add animation
    UIView.transition(with: window,
                      duration: 0.5,
                      options: [.transitionFlipFromLeft],
                      animations: nil,
                      completion: nil)

}
You can choose from a list of preset transition :
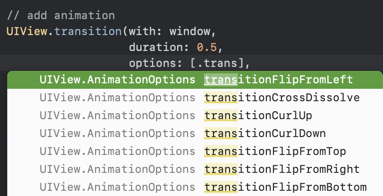
For the code above, we will have a flip animation.
Step 3 : Change the root view controller to login navigation controller after logout
Similar to previous step, we change the root view controller to the login navigation controller after user logs out.
// ProfileViewController.swift
@IBAction func logoutTapped(_ sender: UIButton) {
    // ...
		// after user has successfully logged out

    let storyboard = UIStoryboard(name: "Main", bundle: nil)
    let loginNavController = storyboard.instantiateViewController(identifier: "LoginNavigationController")

    (UIApplication.shared.connectedScenes.first?.delegate as? SceneDelegate)?.changeRootViewController(loginNavController)
}
If your changeRootViewController() function is located in AppDelegate.swift, you can call it using :
(UIApplication.shared.delegate as? AppDelegate)?.changeRootViewController(mainTabBarController)
And now we have implemented the login / logout transition flow by changing root view controller! 🙌
