Localization means making your app support additional languages. Usually we will start with english as the base language as default, then slowly adding more language support on top of it.

Table of Contents :
- Adding new language
- Adding and using translated text
- Localizing word with parameters
- Preferred language and how to change them
- Detecting the current app language
- Localizing App Name and system's message
- Direct user to change language
Before starting localization of your app, make sure the project has "Use Base Internationalization" checked. This is checked by default when you start a new project in Xcode 11.
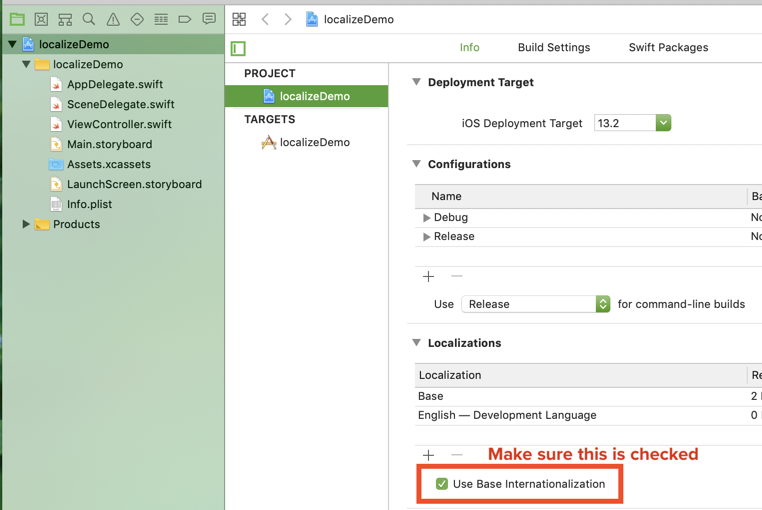
What does "Use Base Internationalization" mean?
When you create a new iOS project in Xcode 11, Xcode will auto generate the resources for the default language (which is the "base" language), like Main.storyboard and LaunchScreen.storyboard, and place them into the "Base.lproj" folder. The "base" means other language added later on will use this as base to refer to.

Adding new language
Now that we have base localization set, we can proceed to add more language by clicking the "+" button below :
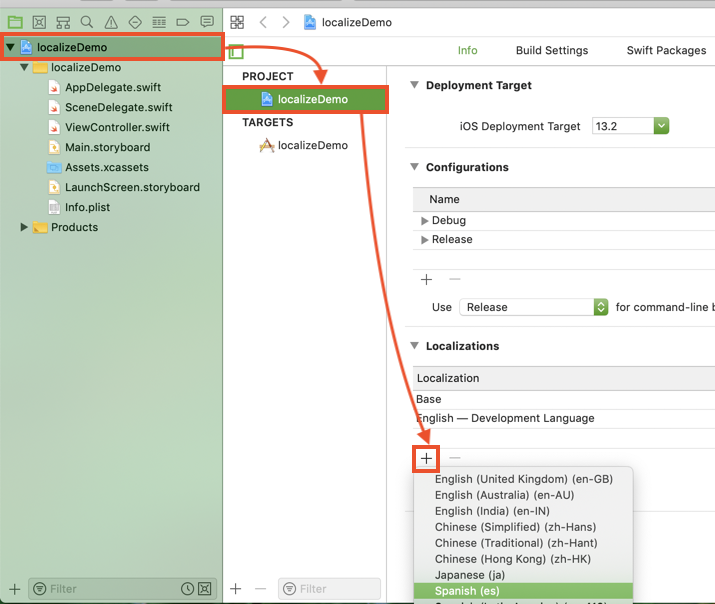
After selecting a language, Xcode will ask if you want to create localization for current resource (storyboard / XIBs) :
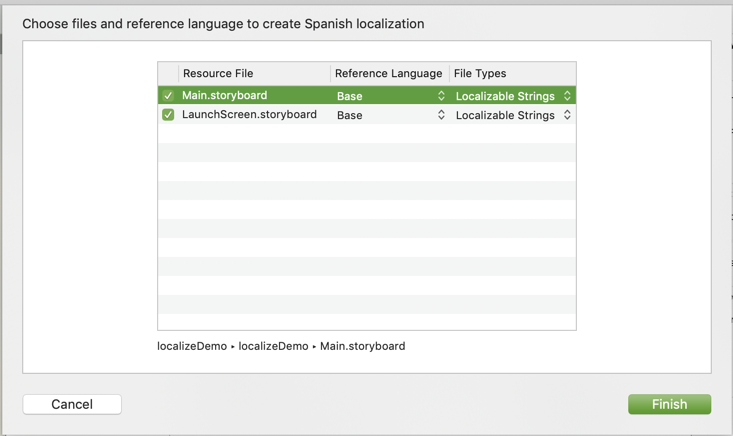
After you click 'Finish' , Xcode will create a Strings file for each of the resources.
For example, say your Main.storyboard has a view controller with two labels like this :
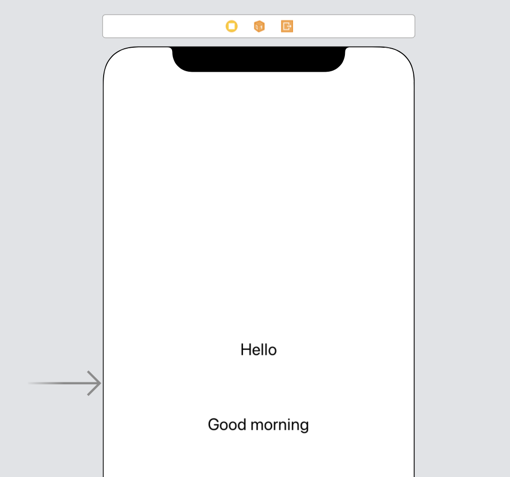
If you have included Main.storyboard (checked in the dialog above) and click 'Finish', Xcode will create a 'Main.strings' file (spanish) for translating the labels shown in the storyboard.

You can change the text of "Good morning" to "Buenos días" in Main.strings, then when you run the app in a device which primary language is set to Spanish, it will show "Buenos días".
I prefer to create a separate Strings file which contain all the text that need to be localized, instead of separating the text based on storyboard files. In this tutorial we will ignore the auto-generated Main.strings file, and creating our own Strings file.
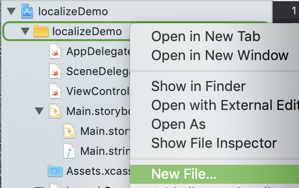
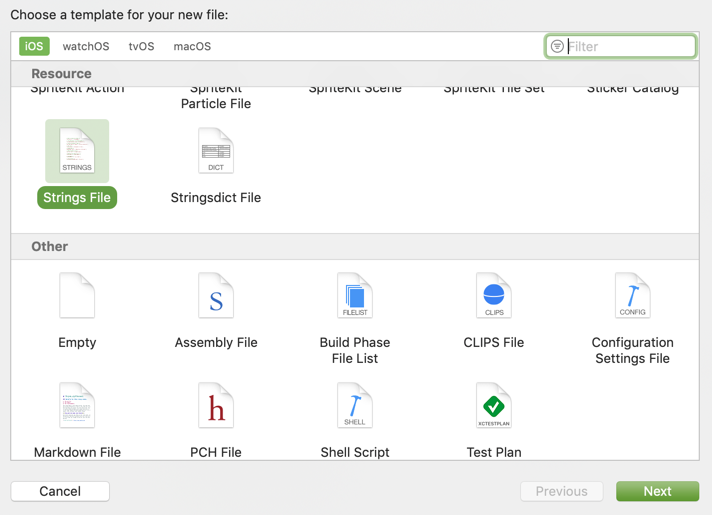
Right click your project folder, select 'New File' , then scroll down to find 'Strings', select it and click 'Next'.
Then name the file as 'Localizable.strings' and click 'Create'. Older Xcode versions will automatically create this file for you when you localize the project, recent Xcode version doesn't do this automatically anymore, hence we need to create it manually.

Now you have a 'Localizable.strings' created for the base language. We can then add a Spanish version (and other languages) of this file, by clicking the 'Localize' button on the file :
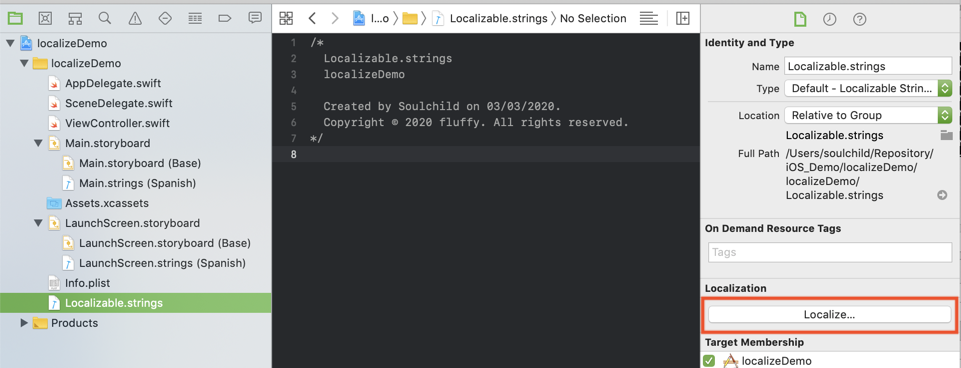
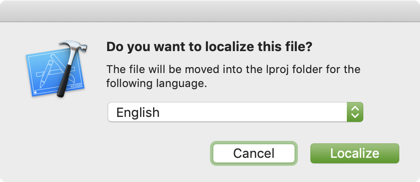
After clicking 'Localize', Xcode will ask if you want to localize the file, and select a default language for it. Usually I use 'English' as the default language and gradually add more language support to it.
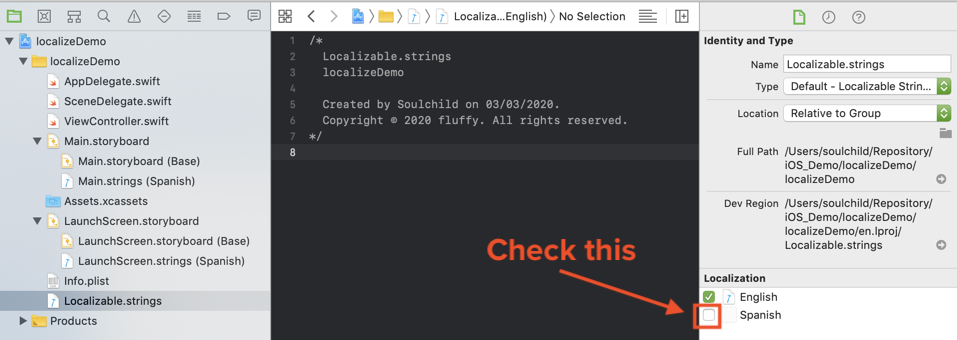
Now on the 'Localization' section of the File inspector, we can see the language available for this project (You can add more language by going back to the project settings and click '+'). Check the 'Spanish' (or the language you have added) to add localization support.
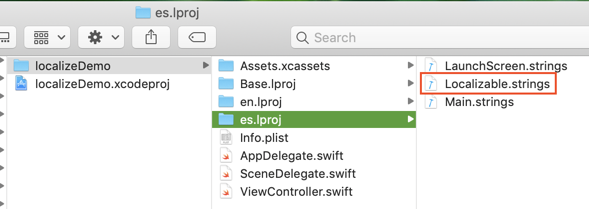
After checking the additional language, you can expand the "Localizable.strings" and see there's multiple language version :

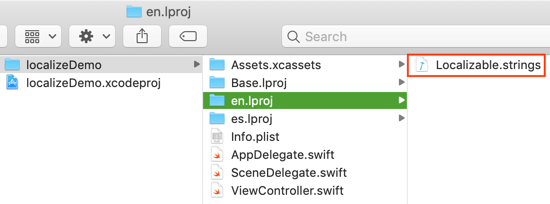
When localizing a file, Xcode will create separate language folder for that file. Eg: "es.lproj" for spanish ("es"), and "en.lproj" for english, etc. The localized file is then put into these folders.
Adding and using translated text
To add translation text, we need to input key value pair of each translation in this format:
"key" = "value";
For example, the english Localizable.strings file looks like this
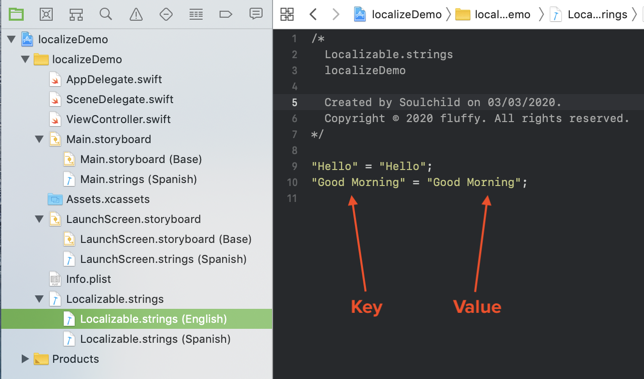
Then in the spanish Localizable.strings file :
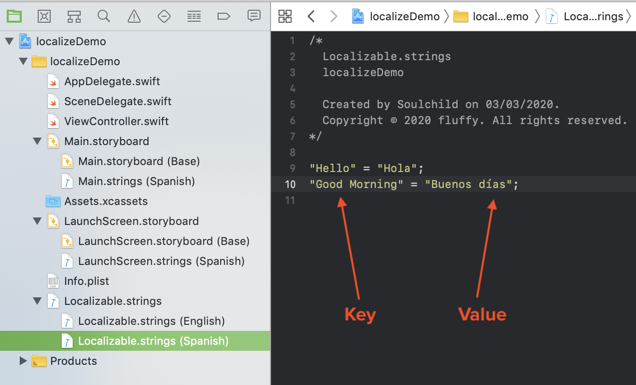
Notice that we uses the same key for the same text translation in both file, and each translation is separated by a semicolon (;).
To use the translation text, we can call Bundle.main.localizedString(forKey:, value: , table: ) :
class ViewController: UIViewController {

    @IBOutlet weak var helloLabel: UILabel!
    @IBOutlet weak var goodMorningLabel: UILabel!

    override func viewDidLoad() {
        super.viewDidLoad()
        // Do any additional setup after loading the view.

        // return 'Hello' for english, 'Hola' for spanish
        helloLabel.text = Bundle.main.localizedString(forKey: "Hello", value: "Hello", table: "Localizable")

        // return 'Good Morning' for english, 'Buenos días' for spanish
        goodMorningLabel.text = Bundle.main.localizedString(forKey: "Good Morning", value: "Good Morning", table: "Localizable")
    }
}
The Bundle.main.localizedString function will search for the value of the specified key in forKey parameter, and return it if it exist. If no such key exist in the strings file, the function will return the string passed into the value parameter.
The table parameter specifies the filename of the strings file to search, in the example above, it will search the key/value pair in "Localizable.strings" file. If you pass in nil for the table parameter, it will look for "Localizable.strings" by default.
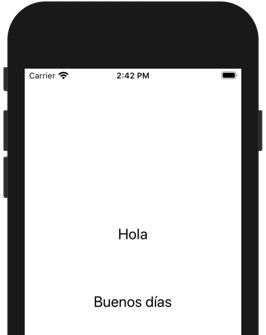
Now if you run the app in spanish language, you will see the following output :
You might have seen NSLocalizedString() function before, it's a shortcut function Apple has provided us. NSLocalizedString take in two parameters, the key and comment, and then it will call Bundle.main.localizedString() by passing the key to forKey and value parameters, and set the table to nil , which will search for "Localizable.strings" file by default.
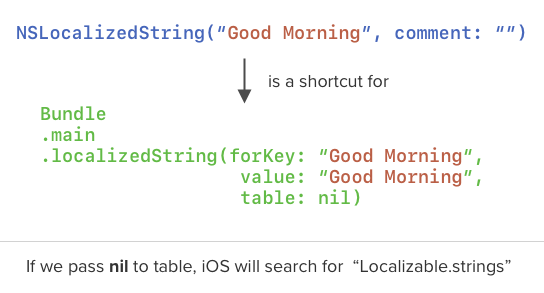
The comment parameter is for your own reference, it doesn't do anything, you can think of it like the comment you place in your code.
We can then replace the Bundle.main.localizedString with the shorter NSLocalizedString like this :
 override func viewDidLoad() {
    super.viewDidLoad()
    // Do any additional setup after loading the view.

    helloLabel.text = NSLocalizedString("Hello", comment: "")
    goodMorningLabel.text = NSLocalizedString("Good Morning", comment: "")
}
Localizing word with parameters
Sometimes we might want to localize text with some parameter, eg: "Hello (username)" , which the username is an input from the user. To interpolate the parameter, we can use the String format function String(format: , args). According to Apple's string programming guide, we can use "%@" to interpolate string, "%d" for integer etc.
We can use "%@" inside the translated text as placeholder, then replace it with the actual username using String(format:, args). Here's an illustration on how it works :

You can use as many parameters as you like, like this : String(format: NSLocalizedString("Hello first middle last name", comment: ""), "First name", "Middle name", "Last name"). As the String(format:, args:) accepts multiple parameters for args.
Preferred language and how to change them
When user launch your app for the first time, iOS will decide which language to use based on their preferred language order, not the iPhone language.
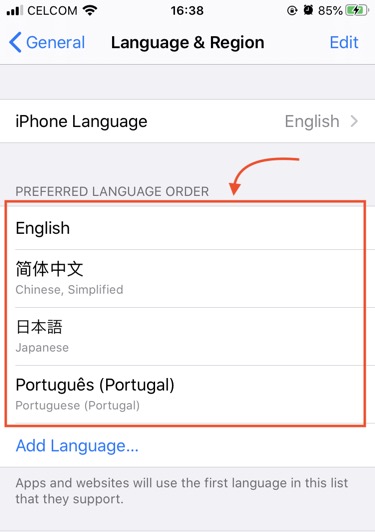
Your user might set iPhone language to English, but using another language as the most preferred language (the top row of preferred language order).
iOS will choose the first matching language from top to bottom in the preferred language list to launch your app. If your app doesn't support all the languages listed in the preferred languages , iOS will try to make guesses to choose the nearest language possible. (eg: your app support Portuguese (Portugal) but the user only have Portuguese(Brazil) and English, then iOS will choose Portuguese (Portugal)).
Source: https://developer.apple.com/videos/play/wwdc2016/201/ , timestamp: 11:02
App-specific preferred language is introduced in iOS 13, this means that user can change preferred language for that specific app. In the Settings app, user can scroll to your app, and change the preferred language for just your app without changing the device preferred languages.
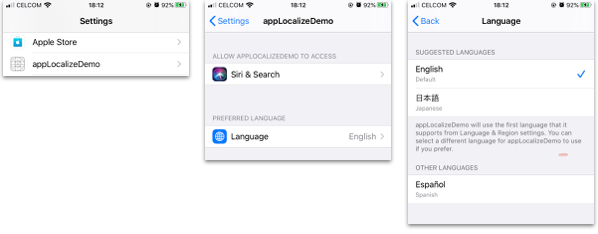
After user change the preferred language for your app and switch back to your app, your app will be relaunched and NSLocalizedString will use the updated language.
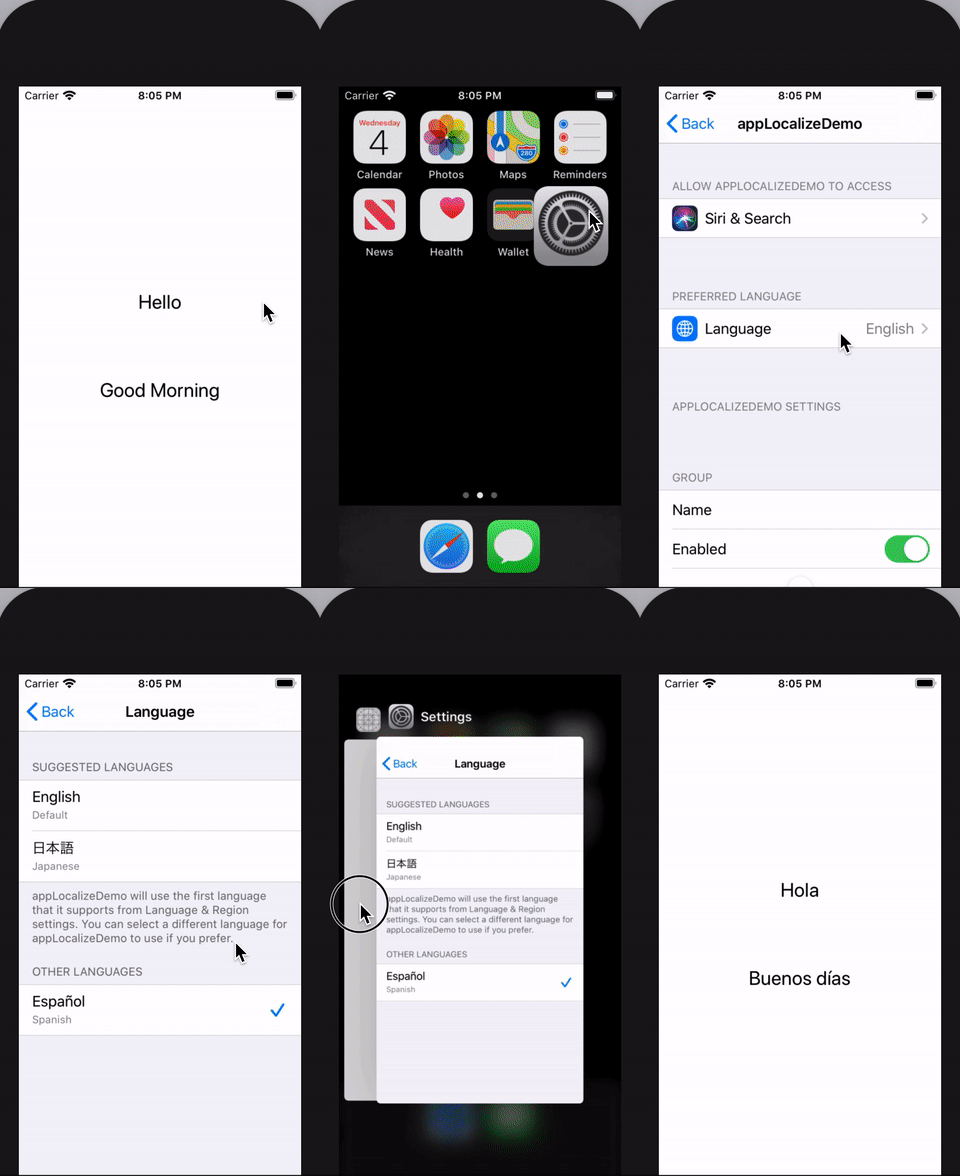
It can be quite troublesome to go to the Settings app, and change language just to test your localization every time you update a text.
To shortcut this process, we can set the app to always launch in a language during debug session. To do this, in Xcode, select Product > Scheme > Manage Schemes ...
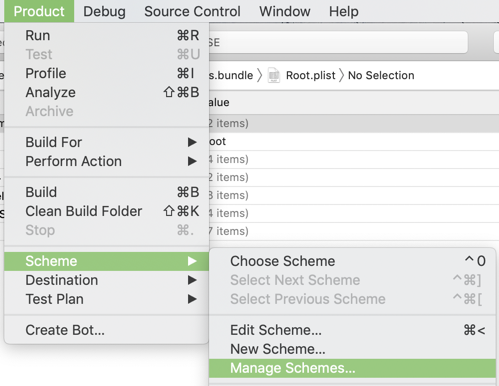
In the scheme window , double click your app scheme :

Then in the Run/debug tab, change the "Application Language" to your desired language.
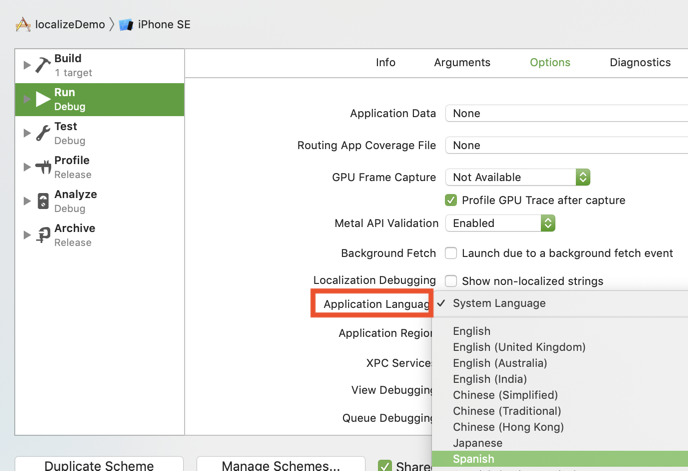
And now every time you build and run your app from Xcode, it will use that language as the preferred language.
Detecting the current app language
Say you want to show / hide some UI based on the current app language (not the device language), you can get the current selected app language with Bundle.main.preferredLocalizations.first .
// if the app language is japanese
if(Bundle.main.preferredLocalizations.first == "ja"){
    print("the app is using japanese language")
}
From Apple's documentation, preferredLocalizations will return an array of strings, containing language IDs for localizations in the bundle. The strings are ordered according to the user's language preferences and available localizations. We use the .first to get the most preferred language of the app (which the app is using).
You might see some StackOverflow answer suggesting to use Locale.preferredLanguage.first for getting the current language, keep in mind that this will get the first preferred language of the device, not the app.

Localizing App Name and system's message
To localize app name and other text that are defined in the Info.plist file (eg: Camera usage description), we will need to create a InfoPlist.strings file. Right click your project folder, select 'New File...' > 'Strings File' , and name it as InfoPlist.strings.


Localize it by clicking the 'Localize' button,
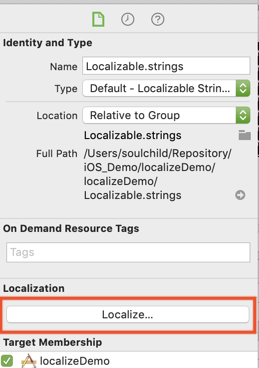
Then check all the language you want to localize in the "Localization" section.
For app name, the key is "CFBundleDisplayName".
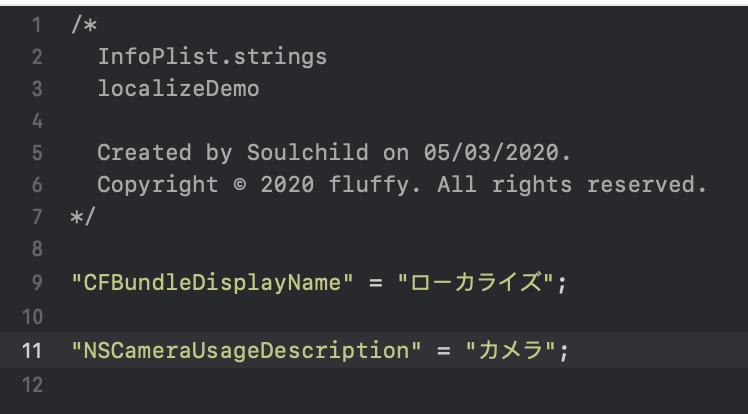
For the other system permission messages like camera usage description, you can get the key of it from Info.plist.
Normally when you open Info.plist, Xcode will show it as a list like this :

To view the raw key value, we can right click "Info.plist", select "Open As" > "Source Code" :

Then you can find the key for the Camera Usage Description, which is enclosed between <key> and </key> tag :

Then you can use this key for the translation text in InfoPlist.strings file.
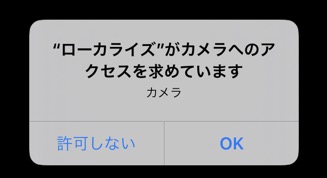
Note that for app name and Info.plist related text localization, it will use the device preferred language, instead of the app's preferred langauge.

Direct user to change language
Since iOS 13, Apple recommend us to direct user to the Settings app to change language, instead of changing the language manually in the app (eg: using Hackish way like changing the AppleLanguages UserDefault key, or use some method swizzling to change the bundle), as there is a lot of work under the hood done by the OS.
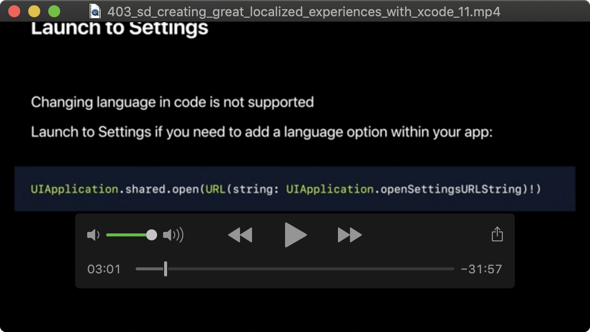
Source: Creating Great Localized Experience with Xcode 11 WWDC video, timestamp: 3:01 .
You can have a change language button in your app, and when tapped, open the Settings app > your app, by using UIApplication.shared.open(URL(string: UIApplication.openSettingsURLString)!) .
