It can be really frustrating when you are following an online tutorial on how to implement in-app purchase, but there's no product returned from the SKProductsRequest ! 😱
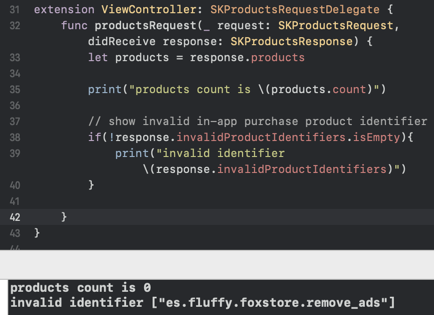
I have seen this question appears a lot of time in discussion forums, comment section of the in-app purchase tutorial or youtube video. Usually the culprit of this issue is related to banking information or you didn't agree to the contract, Apple might not process your in-app purchase products if you didn't complete banking / tax / agreements information, or if you didn't input your in-app purchase correctly.
Here's a checklist (in order from top to bottom) you can check if there is no SKProduct returned from request.
1. You must have a paid Apple developer account
2. Your free and paid apps agreements status are active
3. You have added the necessary Tax information
4. You have added Banking information
5. You have created an explicit App ID for your app
6. You have created an app in App Store Connect, with the correct App ID
7. You have created the in-app purchase item in App Store Connect
8. Your in-app purchase product status is 'Ready to Submit'
9. Your app is using the correct signing Team / provisioning profile
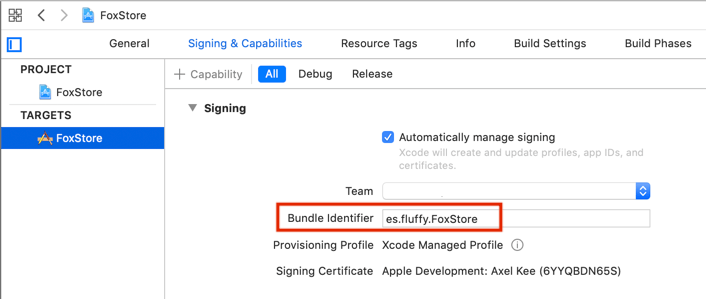
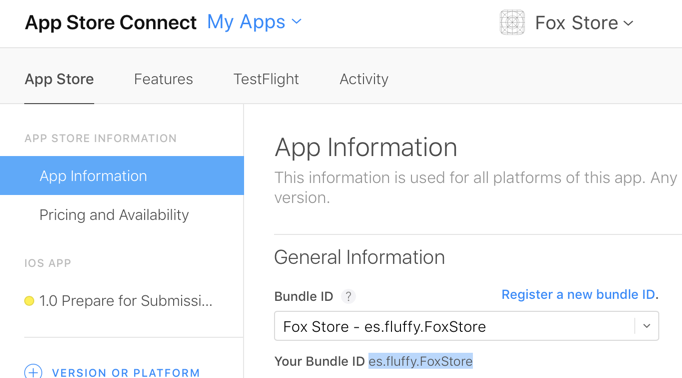
10. Your app's bundle ID in Xcode is the same as App Store Connect
11. You have added In-App Purchase capability to your app's Xcode project
12. You are using the correct product ID when calling SKProductsRequest
13. You have waited at least 15 minutes after creating In-App Purchase item
Bonus guide on how to check if a user has purchased the in-app product previously
1. You must have a paid Apple developer account
Yes, in order to test and implement in-app purchase, you must have a paid Apple developer account. There's no way around it, you can enroll it here if you haven't : https://developer.apple.com/programs/enroll/
2. Your free and paid apps agreements status are active
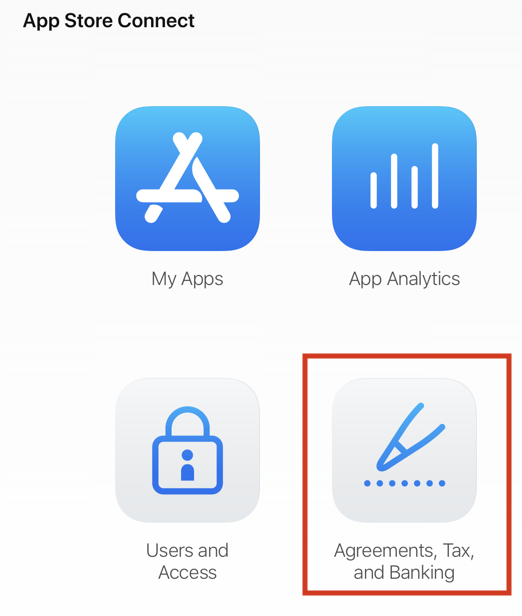
In App Store Connect, click on 'Agreements, Tax and Banking' , then click on the 'Agreements' tab above.
Make sure both of the 'Paid Apps' and 'Free Apps' agreement are in 'Active' state with green dot.
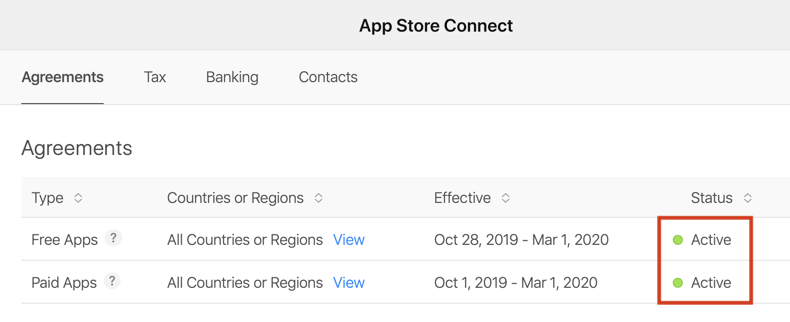
Occasionally Apple might update the agreement terms, which you need to click 'request agreement' link in this page, and click 'Agree' on it to make the status become 'Active'.
3. You have added the necessary Tax information
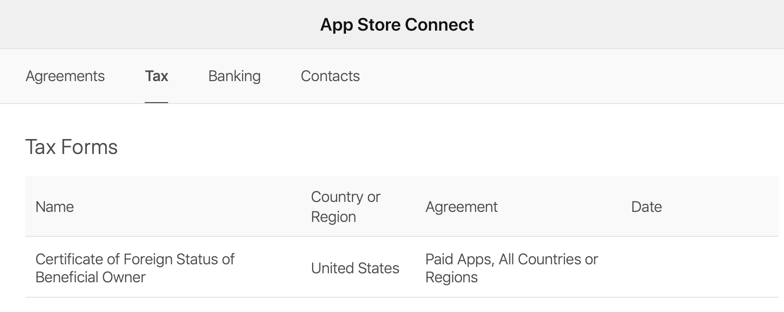
In App Store Connect, click on 'Agreements, Tax and Banking' , then click on the 'Tax' tab above.

At the bare minimum, you must add the tax information for United States as Apple is a company located in United States. If you live in a country where digital products are taxed, you might need to add the tax information of your country too.
4. You have added Banking information
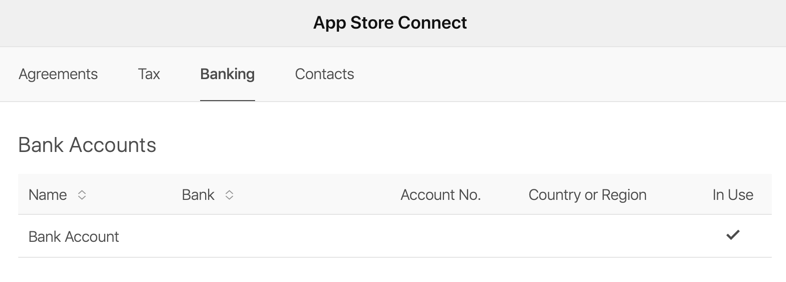
In App Store Connect, click on 'Agreements, Tax and Banking' , then click on the 'Banking' tab above.

You must add at least one banking account, which Apple can transfer your apps earning to you.
5. You have created an explicit App ID for your app
To use in-app purchase capability, you would need a specific bundle ID for your app (can't use the wildcard bundle ID which is auto-generated by Xcode).
If you haven't created an App ID for your app yet, head over to Certificates, Identifier & Profiles in developer center, select 'Identifiers' on the left tab, then click the "+" button to add a new identifier.
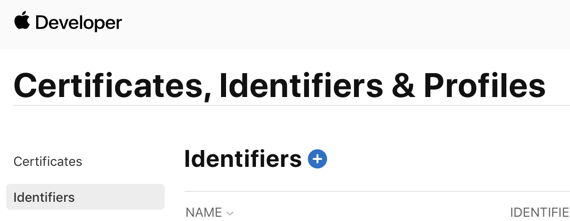
Select 'App ID' , then click 'Next'.

Ensure the Bundle ID of the App ID is the same as the bundle ID of your app's Xcode project bundle ID, and make sure the bundle ID is Explicit :
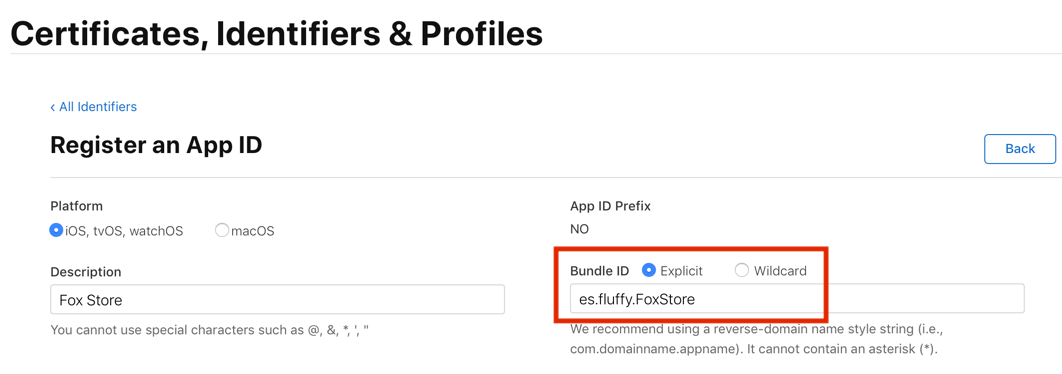
The "In app-purchase" capability in the App ID registration page should be checked by default, feel free to check any other capability you might need, then click 'Register' to register the app ID.
6. You have created an app in App Store Connect, with the correct App ID
To create in-app purchase for your app, you must create an app in App Store Connect. If you haven't already , go to App Store Connect and select 'My Apps'.
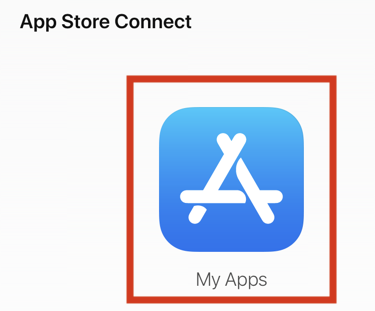
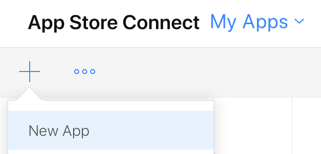
Then click the '+' sign at top left to create a new app.
Fill in the details of your app. For the Bundle ID, select the bundle ID (of the app ID) you've created in previous step.
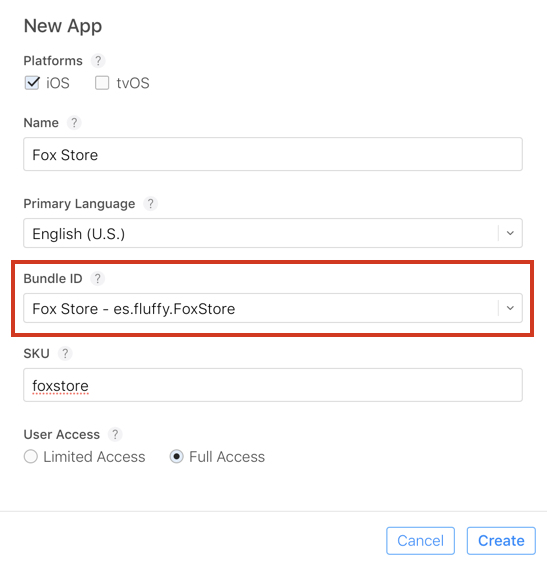
Click 'Create', and you will see your app appear in App Store Connect.
7. You have created the in-app purchase item in App Store Connect
Assuming you have created your app in App Store Connect, the next step is the create the in-app purchase product for your app.
Select your app in App Store Connect -> My Apps, then click the 'Features' tab on top.

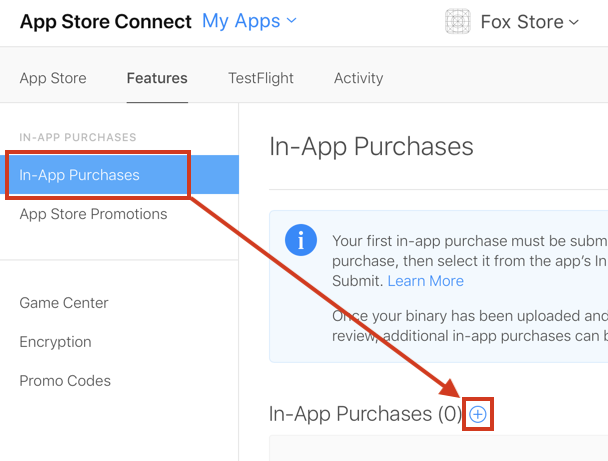
Select 'In-App Purchases' on the left side bar, then click '+' to add a new in-app purchase product.
Select the in-app purchase you want to create, then click 'Create'.
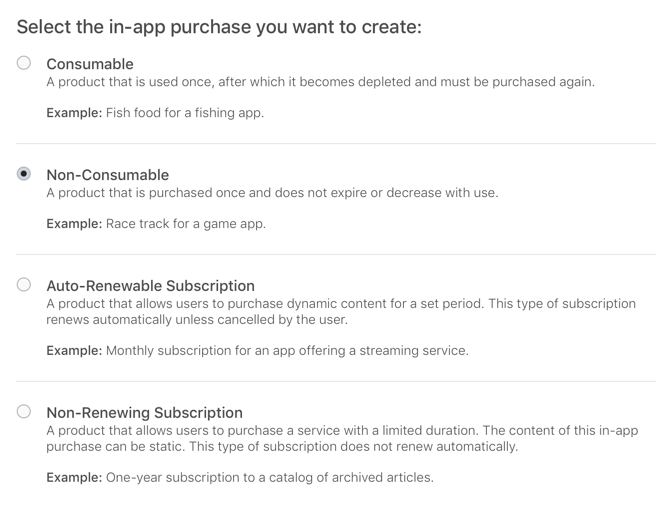
Consumable product example: Coins, user can buy coin and consume it in your app (to buy virtual item), user can buy the coin multiple times.
Non-Consumable product example: Remove Ads feature / Pro feature, user can only buy the feature once, and after purchasing it, the feature is there forever.
Auto-Renewable Subscription product example: Subscription like Netflix / Spotify, where users' card will be charged a fixed amount every week / month / year, until user cancel it. This type of in-app purchase is the hardest to pass App Store Review, and you must justify to Apple why your app is charging user monthly (eg: provide ongoing new content / has monthly server fees etc).
Non-Renewing Subscription product example : Shameless plug, I used non-renewing subscription for my app, Komuter, user pay upfront for a fixed duration (eg: 3 months), then the user can view the premium content for 3 months. After 3 months has finished, user has to purchase again (another 3 months) in your app. Your app has to handle the logic of checking if user subscription is still valid (instead of letting Apple to handle the subscription tracking as in Auto-renewable subscription). Non-renewing subscription is a lot easier to pass App Store Review, I strongly suggest using this instead of auto-renewing subscription if you don't have ongoing server fees.
Select the in-app purchase type you want, then click 'Create'.
Next, fill in the necessary information for your in-app purchase :
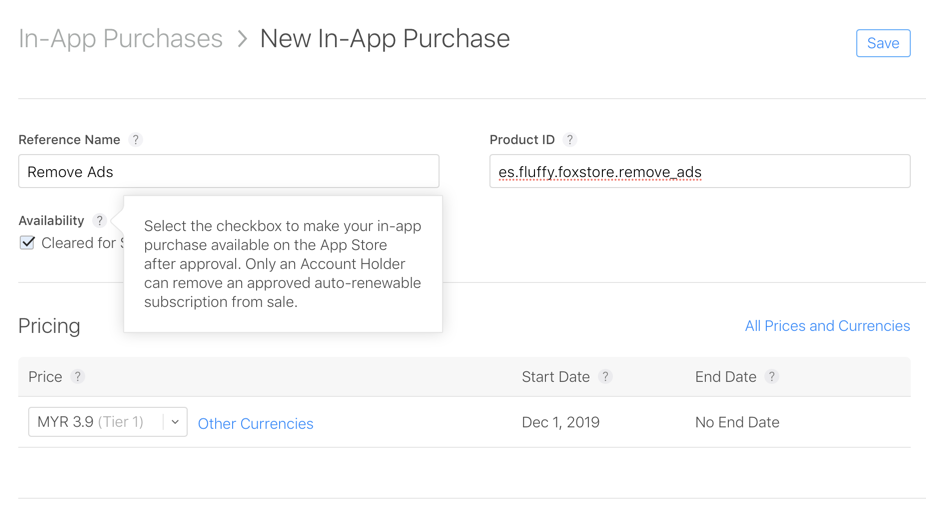
Make sure you have checked "Cleared for Sale" checkbox in the Availability section, this checkbox ensure that your in-app purchase is visible to user.
Take note of the Product ID, as your app code need to include this product ID to get the SKProduct object.
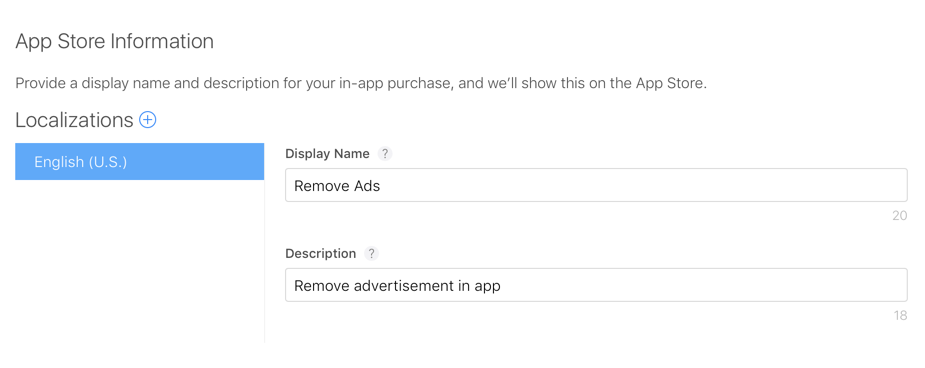
Fill in 'Display Name' and 'Description' fields, user will see these text on the purchase dialog when they buy the in-app purchase inside your app.
Last but not least, include a screenshot of the view which contain the buy button.
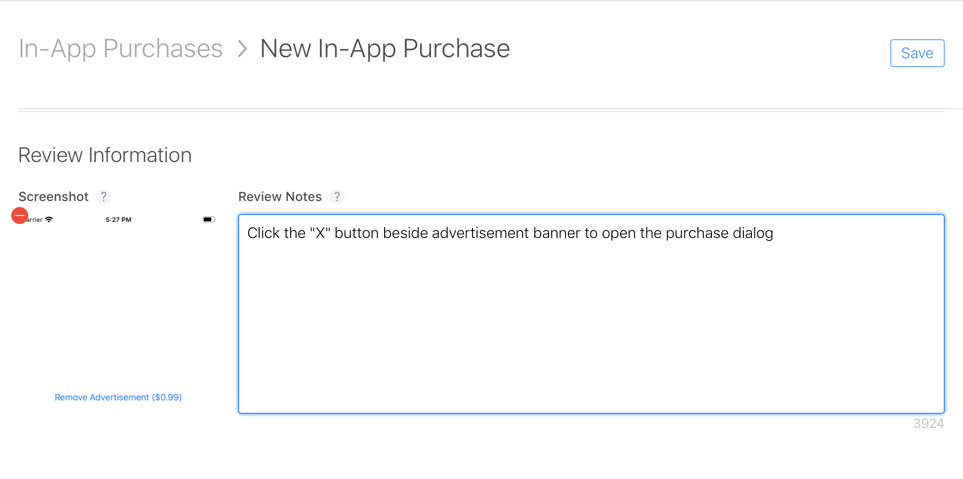
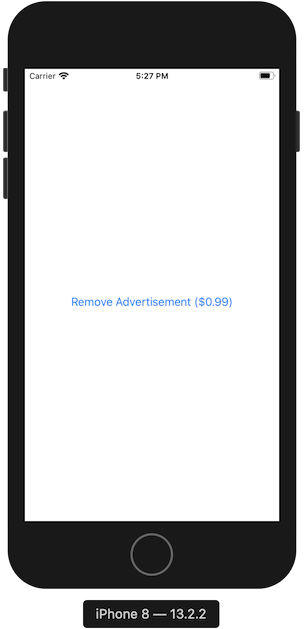
I suggest using iPhone 8 simulator to navigate to the purchase screen, then press Command + S to take a screenshot, then upload this screenshot (as App Store Connect has strict limit on what image dimensions are acceptable)
In the review notes, describe how the user can access the purchase screen (eg: they need to press "X" button beside advertisement to activate the purchase screen). The App Store Reviewer will use this information to trigger the purchase screen, if the reviewer can't figure out how to buy the in-app purchase in your app, they might reject your app submission.
After filling all the details, click 'Save' on the top right corner. You should see that your in-app purchase status is "Ready to Submit.

8. Your in-app purchase product status is 'Ready to Submit'
Would like to emphasize this again as I saw many developers didn't complete the in-app purchase information when creating the in-app purchase, especially the screenshot in Review information section.
If you didn't include all the necessary information for your in-app purchase, you might get the status 'Metadata missing', which might make your in-app purchase not appearing when making a SKProductsRequest call.
Make sure to fill up all the necessary information and include a screenshot for review, then click 'Save' to make your in-app purchase product to become 'Ready to Submit.

9. Your app is using the correct signing Team / provisioning profile
In your app's Xcode project's Signing & Capabilities tab, ensure the Team is correct (same as the company/ individual name you see in App Store Connect).
If you are not using Automatic signing, you have to make sure you are using the correct provisioning profile for your app.


10. Your app's bundle ID in Xcode is the same as App Store Connect
In your app's Xcode project's Signing & Capabilities tab, ensure the Bundle Identifier is the same as the app you created in App Store Connect.

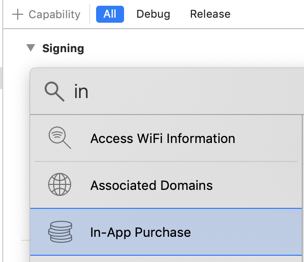
11. You have added In-App Purchase capability to your app's Xcode project
If you haven't already, navigate to the Signing & Capabilities tab in your Xcode project. Click the '+ Capability' button to add a capability, then select 'In-App Purchase'.

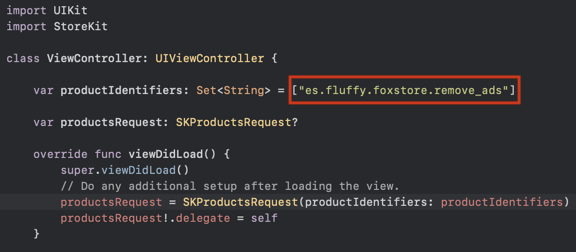
12. You are using the correct product ID when calling SKProductsRequest
This might be obvious, but just in case you have made a typo while typing out the product ID in your code, double check if the product identifier in your code is the same as the one displayed in App Store Connect.

13. You have waited at least 15 minutes after creating In-App Purchase item
Ah yes, sometimes Apple's server can be quite busy. After creating an In-App Purchase product in App Store Connect, you might need to have to wait a while before Apple update their server to include your product. My usual experience for this is that it won't take longer than 15 minutes for your product to appear in the Sandbox store after adding it.
If you done all the above step, your in-app purchase product should appear in the SKProductsResponse object returned from the SKProductsRequest call.
Bonus guide on how to check if a user has purchased the in-app product previously
How do you know if a user has purchased the in-app product previously?
You can use UserDefaults to store a boolean for this, but is it a good way to do so? Here's a short guide on how to check if user has purchased before.
https://drive.google.com/file/d/1mimKinssp99VmCWcUw3NZresWLjkaVy9/view?usp=sharing
